


Unfortunately, 1C recommends that users not to use a web server in file mode and to use client-server mode only. But keep in mind that for small companies with no more than a few accountants, working through a web server with modern configurations based on “managed forms” is an excellent option. It lets networked computers connect to the database relatively quickly, even though the computers themselves are outdated. The main thing is that the web server and the main computer that hosts the databases are reasonably decent.
Here are a few steps for successfully setting up a web server on Apache with 1C, as well as a file-based version without data.
1. Find and download the Apache installer
For reasons unknown to us, Apache no longer publishes new versions as self-extracting distributions. But an older version will do just fine: distribution 2.2.25, which lets us use a convenient installer and avoid unnecessary extra steps later on. Keep in mind: the Apache 2.2 branch is no longer supported. The last release, 2.2.34, came out in July 2017, and there are no security updates for it. The Apache developers recommend moving to version 2.4.
It is best to download the file from: /dist/httpd/binaries/win32
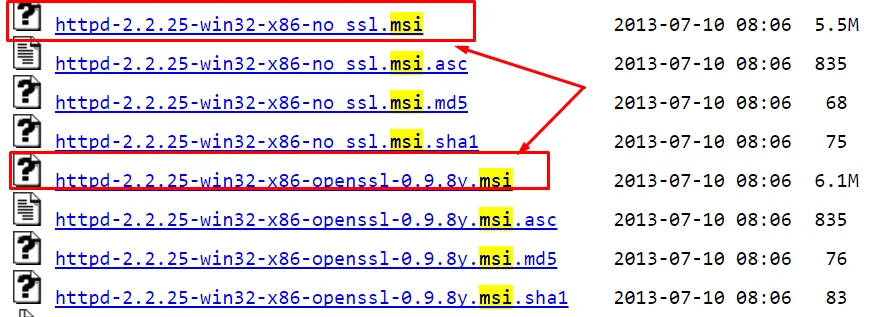
Also, it is best to use only the *.msi installer.
In addition, we do not recommend using the 64-bit version of 1C, since you are likely to run into significant problems when trying to connect other devices or libraries.
If you plan to open databases on your local network, use the “no ssl” distribution. If you want to open the database over the internet, use the “ssl” distribution.
We will walk through the process on a server without SSL that will be used on a local network.
2. Run the installer
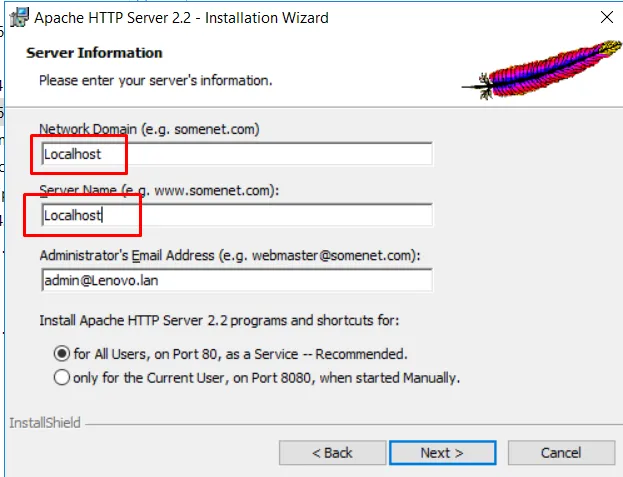
First, fill in Network Domain: Localhost and Server Name: Localhost.
Then click Next, select Setup Type: Typical, then click Next, Next, Install and Finish.
3. Make sure the server has started
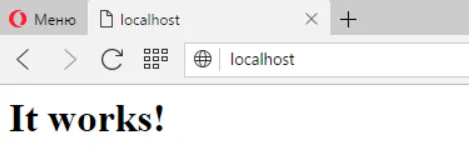
To do this, enter the address http://localhost in any browser. You should then see the message “It works!”
Next, find out your IP address. Click the network icon and open “Network and Sharing Center.”
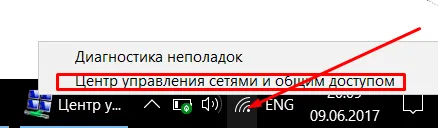
Then click your network connection.
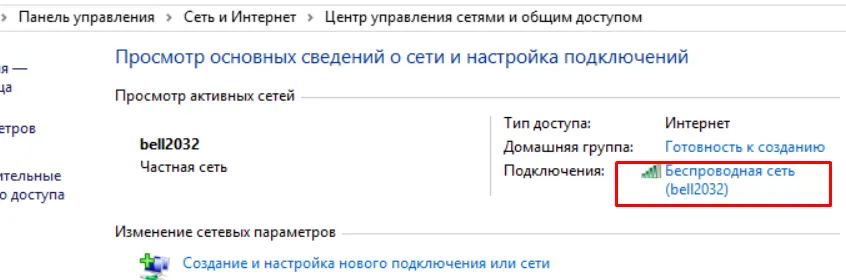
Then click the “Details” button.
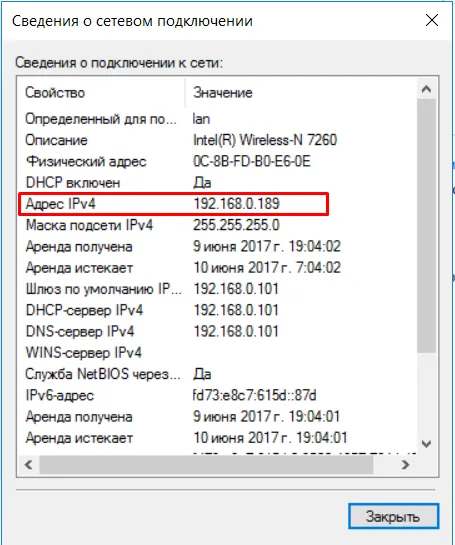
Our local network IP address is 192.168.0.189.
Next, we go back to the browser and check once again that the page with the “It works!” message is available at your IP address.
If the page opens again, everything is fine and we are moving in the right direction!
4. Check other devices and set up the firewall
So, first we try to open the website from another device that is also on the local network.
If something goes wrong, instead of the message we need you will see “This site cannot be reached” or something similar.
In that case, we need to set up the firewall.
To do this, go to the computer where Apache is installed. Click “Control Panel”, then “System and Security” and “Windows Firewall”.
Then select “Advanced settings”.
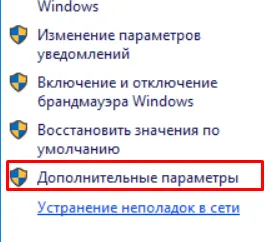
- Then click “Inbound Rules” and click “New Rule.”
- Then click “Port”.
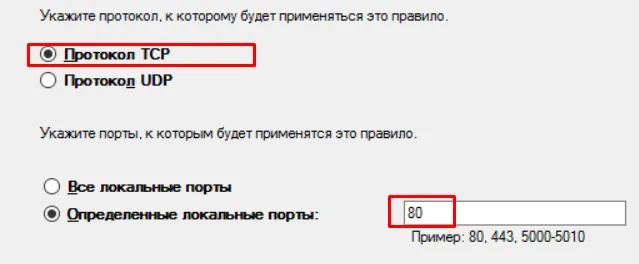
- After that, select TCP and Specific local ports: 80.
Next, select “Allow the connection” and check all three boxes.
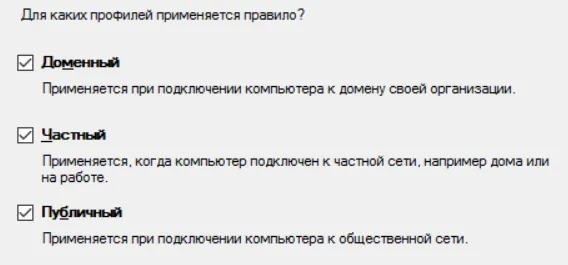
Then enter any name. For example, we entered “Web server port 80 for 1C”.
Great, we did it!
All that is left is to check that the other devices also display the page we need!
5. Launch the database
Now open the database in Designer. Remember: always run 1C as administrator.
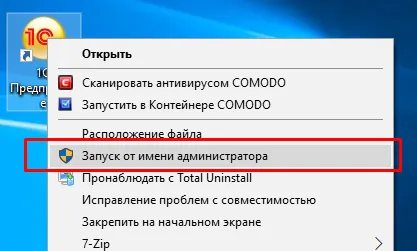
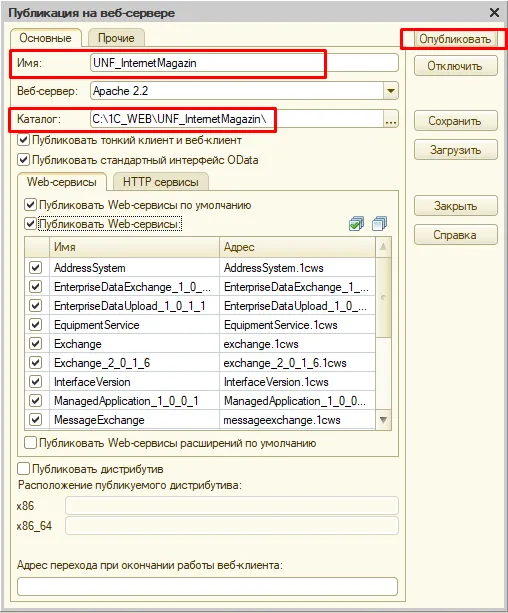
Then click “Administration” and then “Publish to web server.”
The name field can contain only Latin characters, with no spaces, but underscores are allowed.
In the “Web server” field, enter Apache.
What is the directory? In practice, it is a list of files. It is most convenient to give the directory the same name as the database, since that makes things easier for the user.
Leave the other checkboxes as they are in the screenshot. At this stage their values do not really matter to us, so we can deal with them a little later.
Then click “Publish”. If, when you click this button, a message appears saying the program cannot be started, exit 1C and run it as administrator.
You will see the message “Publication completed”. If a message asks “Restart the web server?”, agree to it.
Now try to open the database in the browser, and if everything went well, open it from the other devices too!
Congratulations, you have successfully set up an Apache web server for 1C!